Backflip Preheater – Installation
You are viewing an archived article. Please see our more recent Backflip Preheater Installation article.
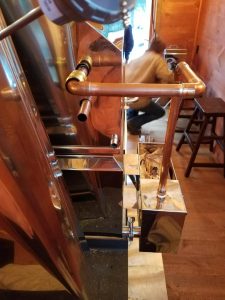
Top right pipe of the preheater is plumbed to the float box. This pipe will feed hot sap into your float box. The Smoky Lake Float Box has a 3/4″ NPT, female fitting.

Add a valve to the drain in the lower right. This valve should be closed while boiling. Drain the system after each boil. That way the pipes won’t freeze/burst. (This photo shows the pipe before the valve was attached.)

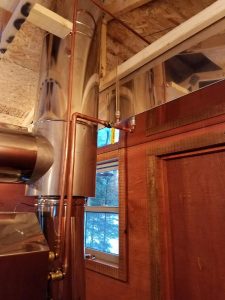
The bottom left pipe of the preheater is connected to a head tank. The head tank will feed raw sap into the preheater. This particular head tank has a sight glass attached to it so that the operator knows how much sap is in it at all times. The top left pipe from the preheater is a vent. It must extend higher than the head tank.